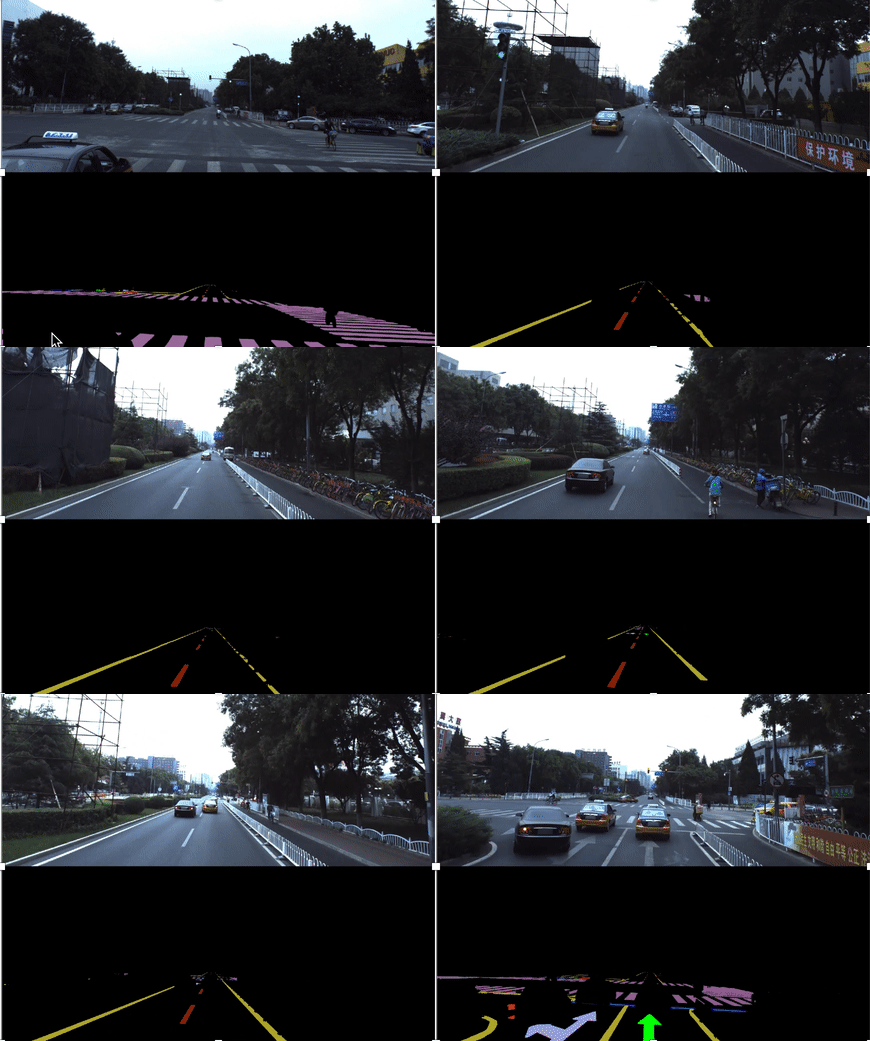
3 · Dataset Structure
The folder structure of the landmark detection challenge is as follows:
{root}/{type}_{road id}/{type}/{record id}/{camera id}/{timestamp}_{camera id}{ext}
The meaning of the individual elements is:
rootthe root folder of the Apolloscapes dataset.typethe type/modality of data, e.g.ColorImageand 'Labels'.road idan identifier specifying the road, e.g. road02.record idthe folder name of a subset of images. Defined by the data collection system.camera idimages are grouped by the cameras that capture them. In Apolloscape there are always two cameras: 'Camera 5' and 'Camera 6'.timestampthe time when each image is captured.extthe extension of the file. '.jpg' for RGB images and '.png' for groundtruths.
4 · Scripts
The evaluation scripts are released on github here. For lane segmentation, the codes are under /dataset-api/lane_segmentation/. The structure of the script is described as below:
helpershelper files which include usful information of using our evaluation filesevaluationthe main file for validating your approachthirdPartycontaining scripts from external libraries. We borrow some codes from Cityscapes.
Note that all files have a short description at the top. Most important files are listed as below
helpers/laneMarkDetection.pythe main file defining the IDs of all lane classes and providing mapping between various class properties.evaluation/evalPixelLevelSemanticLabeling.pyscript to evaluate pixel-level lane labeling results on the test set.install.shinstallation script of this library. Only tested for Ubuntu.
The scripts can be installed by running install.sh in the bash: sudo bash install.sh
This tool is dependent on the evaluation script from cityScape dataset, which is will be pulled recursively
5 · Evaluation
Once you want to test your method on the test set, please run your approach on the provided test images and submit your results to our ApolloScape Challenge:
For semantic labeling, we require the result format to match the format of our label images.
Thus, your code should produce images where each pixel's value corresponds to a class ID as
defined in laneMarkDetection.py. Note that our evaluation scripts are included in
the scripts folder and can be used to test your approach. For further details regarding the
submission process, please consult our website.
Run the following code for a sample evaluation:
cur_dir=`pwd`
export PYTHONPATH = PYTHONPATH:cur_dir
python evaluation/evalPixelLevelSemanticLabeling.py ./test_eval_data/ ./test_eval_data/pred_list.csv ./test_eval_data/ ./test_eval_data/gt_list.csv
6 · Metric formula
We adopt the widely used mean IoU metric which is presented in cityscape metric here. For each class, given the predicted masks and ground truth
of image
and class
, the metric for evaluation is defined as:
7 · Rules of ranking
Result benchmark will be:
| Method | mean iou | lane name 1 | lane name 2 | lane name 3 |
|---|---|---|---|---|
| Deepxxx | xx | xx | xx | xx |
Our ranking will determined by the mean iou of all lane classes.
Submission of data format
- Example dir tree of submitted zip file
├── test
│   ├── road_name_1
│   │   ├── image_name1.png
│   │   ├── image_name1.png
│   │    ...
│   ├── road_name_2
│   │   ├── image_name1.png
│   │   ├── image_name2.png
- Example format of
image_name1.png
- image_name1.png is a prediction label image, which should have the same name and same size as the testing image. In this image, each pixel encode the class IDs as defined in our labels description. Note that regular ID is used, not the train ID.
- Each pixel is encoded as
uint8format.

